Azure Sentinel
Introduction
This guide tells you how to authenticate the Microsoft Azure Sentinel connector in Swimlane using OAuth 2.0 Client Credentials. You will create an Azure app, assign required permissions, collect required identifiers, and configure the connector in Swimlane.
Prerequisites
Azure Access Requirements
You must have Azure permissions to:
- Register applications under Azure Active Directory
- Assign API permissions
- View subscription and workplace information
- Assign roles on the Azure Sentinel workspace
Required Credentials
During setup, you will collect:
- Client ID
- Client Secret
- Tenant ID
- Token URL
- Host URL
- Subscription ID
- Resource Group Name
- Workspace Name
- Workspace ID
Token URLs
Action Type | Token URL |
|---|---|
Log Analytics Query | https://login.microsoftonline.com/{tenant_id}/oauth2/token |
All other Actions | https://login.microsoftonline.com/{tenant_id}/oauth2/v2.0/token |
Host URLs
Action Type | Host URL |
|---|---|
Log Analytics Query | https://api.loganalytics.azure.com/ |
All other Actions | https://management.azure.com/ |
Azure Setup
Take the following steps to register the application:
- Navigate to Azure Portal > Azure Active Directory > App Registrations.
- Click New Registration.
- Enter an application name.
- Choose Accounts in this organizational directory only.
- Click Register.
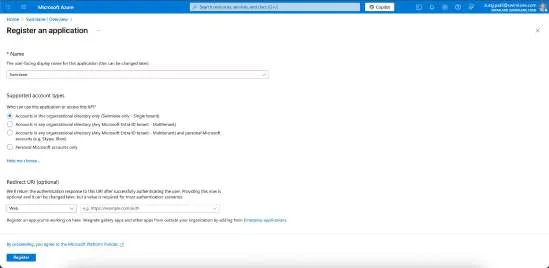
Take the following steps to assign API permissions:
- Open API Permissions tab
- Click Add a permission
- Add the following permissions:
- Microsoft Graph/SecurityEvents.ReadWrite.All
- WindowsDefenderATP/Alert.ReadWrite.All
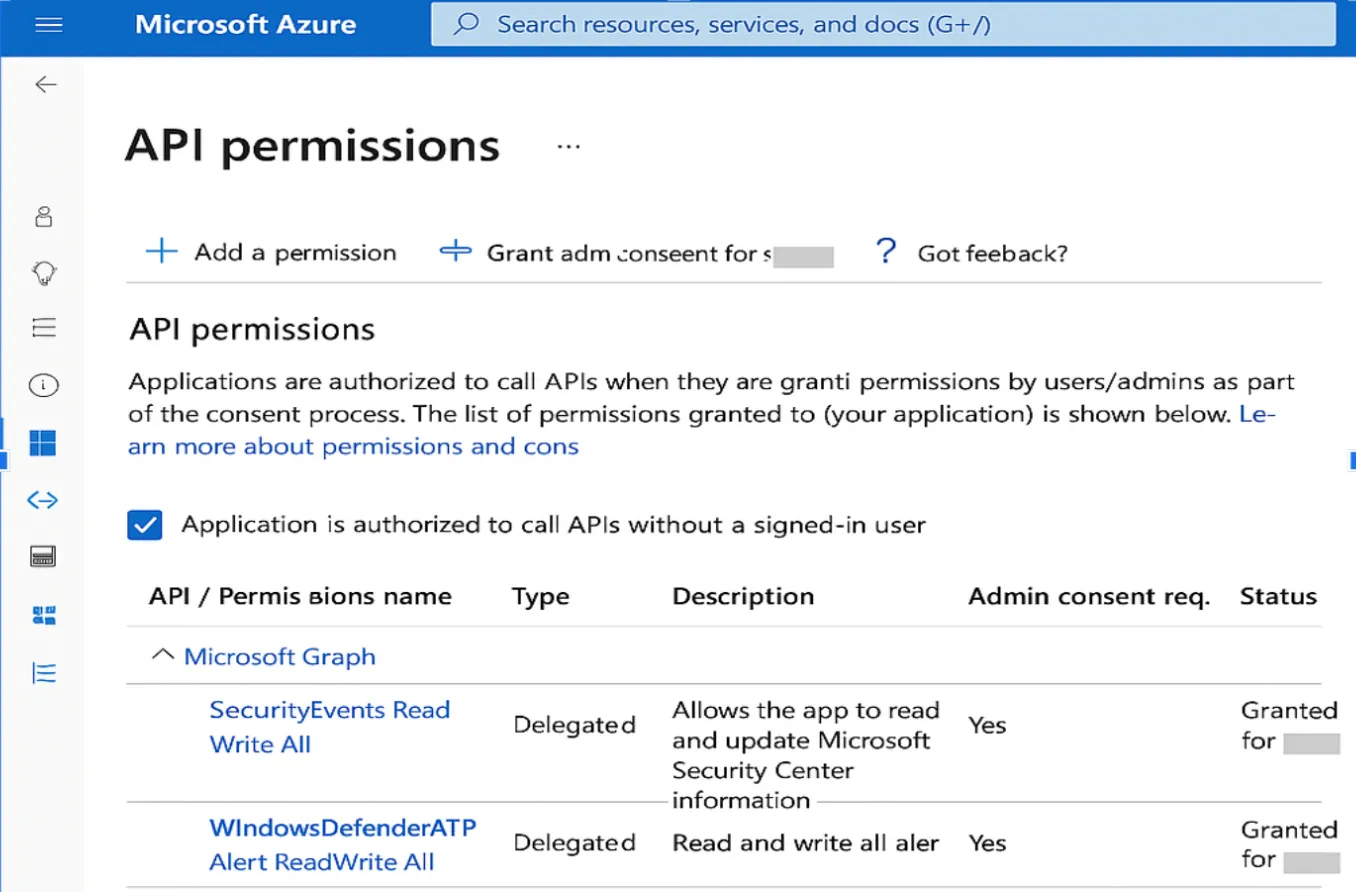
Take the following steps to generate a Client Secret:
- Navigate to Certificates & Secrets.
- Click New client secret.
- Add description and expiration.
- Copy and save the value. This saved value is Client Secret.
Take the following steps to collect required Identifiers:
- From App Registration>Overview, copy:
- Client ID
- Tenant ID
- From the Azure workspace sections, copy:
- Resource Group Name
- Subscription ID
- Workspace Name
- Workspace ID
Connector configuration in Swimlane
- Log in to Turbine.
- From the left-hand navigation pane, click ORCHESTRATION and click Assets. Asset homepage opens.
- Click the plus icon to open the Configure your Connector Asset window.
- Select Microsoft Azure Sentinel from the Asset type list.
- Fill in the Asset Settings and Asset Input as shown:
Field | Description | Required/Optional |
|---|---|---|
url | Host URL based on action type | Required |
token_url | Token URL with Tenant ID included | Required |
client_id | Client ID from Azure | Required |
client_secret | Client Secret from Azure | Required |
scope | Optional, leave blank unless specified | Optional |
verify_ssl | Enable/Disable SSL Verification | Optional |
http_proxy | Optional proxy configuration | Optional |
Fields with * marks are required.
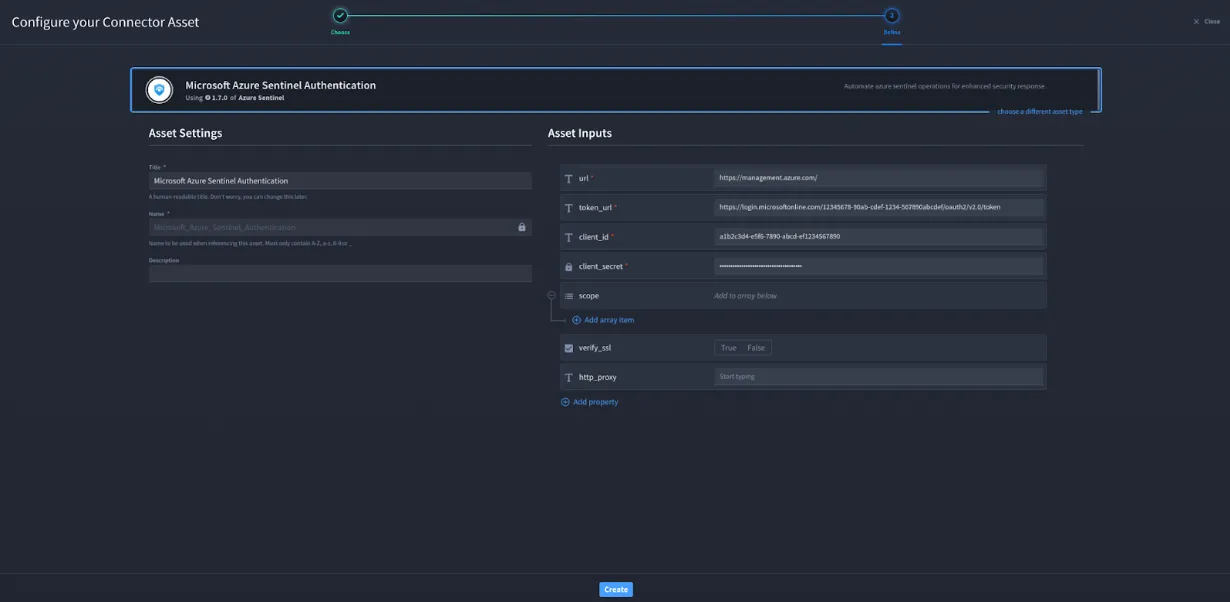
- Click Create.
Troubleshooting
If you encounter a 403 error:
- Ensure the Azure app is added to the Sentinel workspace.
- Assign Contributor role.
You have successfully authenticated the Azure Sentinel Connector in Swimlane.