User Content Homepage
The homepage displays a list of content packages, along with the ability to Push and Pull changes with Git integration if a remote repository is configured.
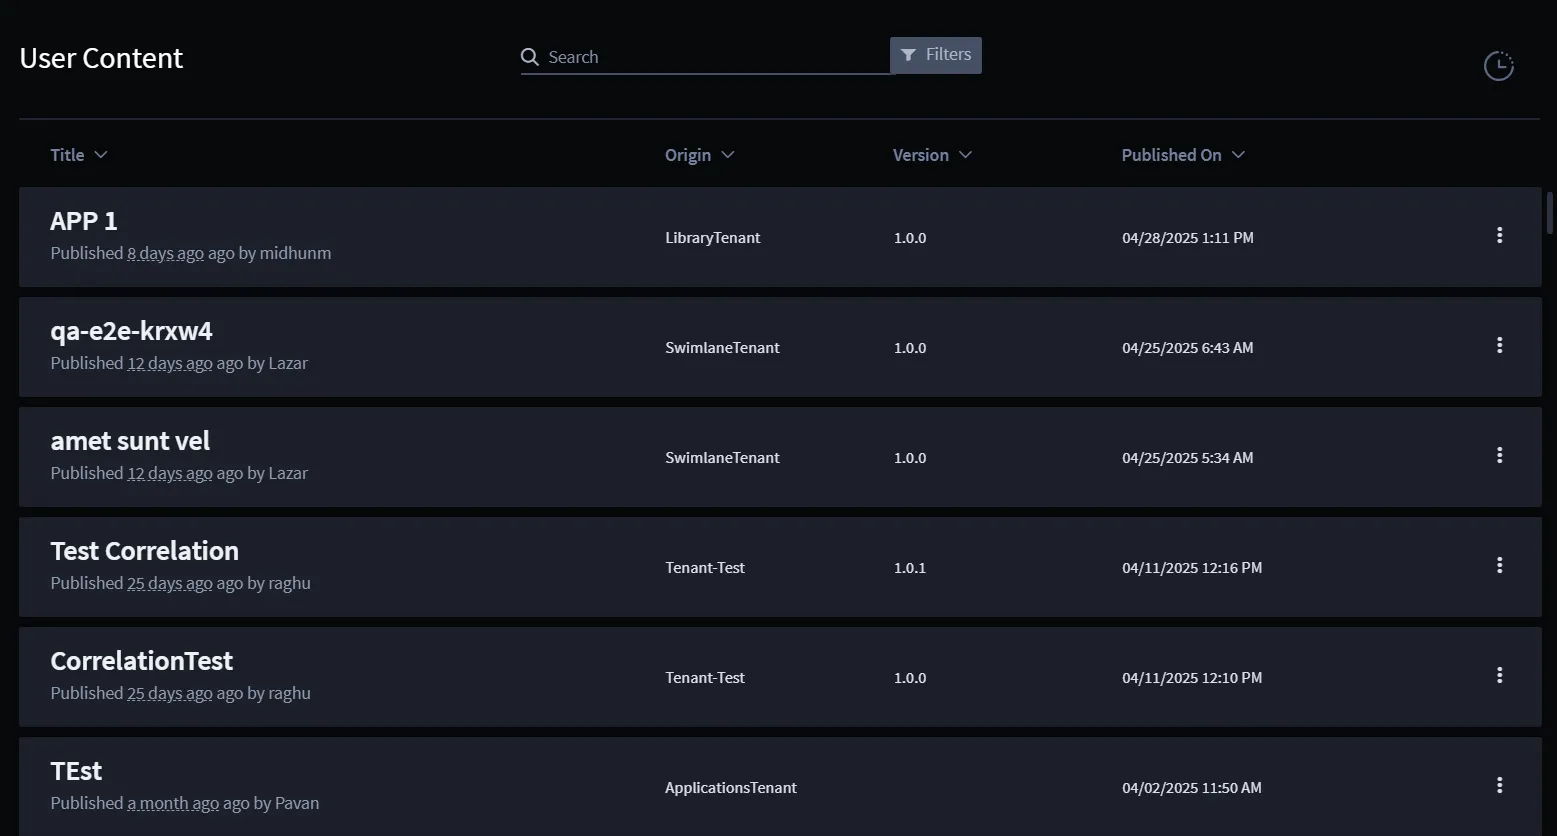
Here’s what is displayed:
- Title: The name of the content package .
- Origin: The originating tenant where the content was published or shared from.
- Version: Displays the version of the published content. The Version displays version information only for content published from version 25.1.0 onward. For SSPs published before this version, the field appears empty. However, performing a revert operation on such SSPs will populate version information for their earlier publishes.
- Published On: The date and time the content was published.
New with Git Integration: Push and Pull Content.
The Push and Pull buttons are enabled only if Git integration is enabled and if a remote repository is set.
- Push : After publishing content into your Library, click the Push button in the top right to commit and push the changes to your connected remote repository.
- Pull : Retrieve updates from the remote repository by clicking the Pull button. This will sync the latest changes from the repository into your Swimlane Turbine library.
Ellipses Menu Options
Clicking on the ellipses (⋮) next to each content item opens additional options:
- Details : View detailed information and description about the content package and what it contains.
- Version History : Review the history of changes made to the content, allowing you to track updates and revert to previous versions if necessary.
- Deploy : Deploy the playbook or component to another environment or tenant.
- Delete : Permanently remove the selected content from the library.
Pull Changes from a Remote Repository
- Click the Pull button located at the top-right corner of the Content tab to start pulling the latest changes from the remote Git repository. Pull button is not displayed when remote repository is not configured. It also displays the number of commits the remote repository has. If there are no differences between the two repositories, when you hover the mouse on the button it displays there are no changes to pull.
- If there are any merge conflicts between the remote repository and your Turbine Library, a Merge Conflict dialog will appear. The dialog lists the list of affected content and provide options:
- Keep Library changes: Retain the current version in your Turbine Library.
- Keep remote changes: Use the version from the remote Git repository.
- Click Apply to resolve conflicts with your selected option.
- Once the process is complete, a Success message confirming that all changes were successfully pulled into your Library is displayed.
- Click Close to finish the process.
Push Changes to a Remote Repository
The "Push" button will not display when the remote repository is not configured. It will also display the number of commits that the local repository have that the remote repo do not. If there are no differences between the two repos, on hover the button will say "there are no changes to push."
- When a remote repository configured, click the Push button located at the top-right corner to start pushing changes in your Turbine library to the remote repository.
- A progress dialog appears to show the status of the push.
- If there are any merge conflicts between the remote repository and your Turbine Library, a Merge Conflict dialog will appear. The dialog will list the affected content and provide options:
- Keep Library changes: Retain the current version in your Turbine Library.
- Keep remote changes: Use the version from the remote repository.
- Click "Apply" to resolve conflicts with your selected option.
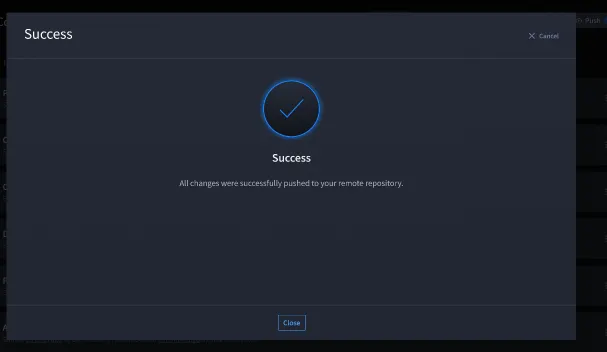
- Once the process is complete, a Success message confirming that all changes were successfully pulled into your Library is displayed.
- Click Close to finish the process.
Resolving Merge Conflicts in Swimlane Turbine
Merge conflicts in Swimlane Turbine are rare but can occur in the following situations:
- The remote repository is modified outside of Swimlane Turbine, such as via direct commits or edits made in GitHub or GitLab.
- The repository is shared across multiple Turbine accounts, and concurrent changes lead to inconsistencies during push or pull operations.
Unless one of these scenarios occurs, conflicts are unlikely during regular use.
Conflict Resolution in Swimlane Turbine
Swimlane Turbine resolves merge conflicts at the application (package) level. When multiple content items have conflicts between the Turbine Library and the remote Git repository, the conflict resolution dialog presents each item individually.
For each conflicted application, you can:
- Keep local changes: Retain the version currently in your Turbine Library.
- Keep remote changes: Accept the version from the remote repository.
Each option is accompanied by metadata to help inform your decision, including:
- Last Published Time
- Published By (username)
Each conflicted item supports independent resolution using local or remote changes, with contextual metadata displayed.
Steps to Resolve Merge Conflicts:
- Trigger Conflict Detection: During a push or pull operation, if any conflicts are found, a Merge Conflict dialog will appear.
- Review Conflicted Items: All applications with detected conflicts will be listed individually in the dialog. You will see the local and remote versions side by side, along with metadata such as last published time and user.
- Choose a Resolution for each item:
- Keep local changes: Preserve the version in your Turbine Library and overwrite the remote version.
- Keep remote changes: Accept the version in the Git repository and discard your local version.
- After making selections, click Apply to resolve the conflicts.
- Complete the Operation: Once conflicts are resolved, the system continues the push or pull operation to synchronize your content.
Key Considerations:
- Application-Level Resolution: Conflicts are resolved per application or package. Line-by-line resolution is not currently supported.
- Change Tracking: Metadata such as timestamps and authorship help clarify which version to keep in complex scenarios.
- Conflict Rarity: Merge conflicts are most likely in environments with shared repositories or manual remote changes.
Handling Errors in Swimlane Turbine During Git Operations
When pushing or pulling changes to/from a remote repository in Swimlane Turbine, you may encounter various errors. Below are common errors and their respective handling instructions:
Error | Cause | Solution |
|---|---|---|
Unable to Connect to Remote Repository | The repository credentials are incorrect or missing, or the URL is wrong. | Verify the repository URL and authentication credentials (for example, personal access token). Update the credentials in Account Settings > Git Integration, then try again. Wait a few minutes and retry. If the issue persists, contact your support team or the repository provider to verify server status. |
500 Internal Server Error | The remote Git host or network returned a server error. | Wait and retry. Check whether the repository provider reports an outage. Confirm your token and permissions are still valid. If it continues, contact your repository administrator or support with the time of the error. |
Unable to Connect to Remote Repository (network or host) | The client cannot reach the host (firewall, DNS, VPN, or the service is down). | Confirm you can reach the Git server from your network (browser or git CLI). Check VPN, firewall, and proxy rules. Verify the hostname resolves and the URL matches what your org uses. |
Unable to Connect to Your Remote Repository (Push Failure) | An unexpected error occurred during push (permissions, branch protection, or remote rejection). | Confirm you have push access to the branch, branch protection allows the operation, and the remote is not rejecting large files or hooks. Retry after a pull if the remote has new commits. Review any message in the Turbine UI for details. |
Unable to Connect to Your Remote Repository (Pull Failure) | An unexpected error occurred during pull (permissions, conflicts, or remote state). | Confirm you have pull access. Retry when the remote is available. If conflicts are indicated, resolve them per your team’s process or reset from a known good commit with administrator help. |
Content Published Locally but Remote Sync Failed | The content was saved in Turbine, but syncing to the remote repository failed. | Retry the sync from the Library or Git workflow when the remote is healthy. Confirm credentials and that the remote repository exists and is writable. |
Content Deleted Locally but Remote Sync Failed | The deletion applied in Turbine, but the remote could not be updated. | Retry the operation. Confirm delete permissions on the remote and that the branch is not protected in a way that blocks the change. |
Unexpected Error Occurred | A generic failure (server, network, or client). | Retry after a short wait. Note the time and any message shown. Verify Git integration settings and token expiry. If it repeats, contact Swimlane Support with those details. |
Understanding the Content Details Tab
The Details tab within a content package in User Content provides a comprehensive overview of content package. Following are the key features of the Details tab:
- Title: The name of the content (for example, CSC - Update Invoking Record).
- Created Date: The date when the content was originally created (for example, 02-01-24).
- Description: A detailed description or summary of the content. This is used to explain the purpose and key details of the content.
- Workspace Overview (at the top):
- Displays a summary of content items associated in the package , such as:
- Workspaces: The number of workspaces linked to this content (for example, 1).
- Playbooks: The number of playbooks associated with this content (for example, 2 in one area and 3 in another).
- Components, Assets, Applications, Applets, Reports, and Dashboards: Lists the numbers of these items linked to the content.
Understanding the Package Contents Tab
The Package Contents tab provides a detailed breakdown of the entities included within the selected content item, such as playbooks, webhooks, workspaces, reports, and more. This tab allows users to see all associated entities at a glance.
The Package Contents tab allows administrators and users to quickly view all the assets and resources tied to a specific content item, making it easy to understand how the various entities work together.
Understanding the Version History Tab
The Version History tab provides a record of all the versions associated with a particular content item. This tab allows users to track the changes made over time, review past modifications, and, if necessary, revert to a previous version.
Key Features of the Version History Tab:
- Version Number:
- Each version is labeled with a specific number (for example, 2.0.0, 1.1.0). The current version is clearly marked, helping users easily identify the latest version in use.
- Last Modified:
- This column displays the date and time when each version was last modified (for example, 03-31-24, 02:24:19pm).
- It helps users track when changes were applied.
- Message:
- This column provides a brief message or description of the changes made in each version (for example, Bug fix, Initial release, or more detailed change notes like Updated app to reflect current Crowdstrike auth token).
- These messages give insight into the purpose of each update, whether it was for a bug fix, new feature, or enhancement.
- Version Selection: Users can select a previous version if they need to review or restore it.
Deploying Content to Tenants
You can deploy a content package from User Content to one or more tenants in a single deployment. You can select the target tenants, choose the package content to deploy, track deployment progress, resolve conflicts, and review the result for each tenant.
Multi-tenant content deployment is available when the Multi Tenant Content Deploy feature flag is enabled. Contact your administrator to enable it for you.
Deploy Content to Multiple Tenants
Take the following steps to deploy a content package:
- From User Content, locate the content package you want to deploy.
- Click the ellipsis menu (⋮) for the package.
- Select Deploy.
- The Deploy Content window opens and displays the available tenants.
- The tenant list contains the following information:
Column | Description |
|---|---|
Tenant | Name of the tenant available for deployment. |
Status | Indicates whether the package has already been deployed to the tenant. |
Last Deployed | Date and time the package was last deployed to the tenant. |
- Select one or more tenants where you want to deploy the content.
- You can use the Search field to find a tenant by name.
- You can also use the Status filter to display Deployed, Not Deployed, or all tenants.
- Click Next. Turbine initializes the deployment.
- In the Deploy Package window, review the content included in the package.
- Select the package items you want to deploy. Clear the selection for any items you do not want to deploy.
- To import playbooks and webhooks in an enabled state, enable Import playbooks/webhooks in enabled state.
- Click Deploy.
The deployment starts and the Deploy Package window closes. A notification appears in the lower-right corner displaying:
Deploying <package name> to selected tenants
Click View Progress to open the Content Activity page and monitor the deployment.
Content Activity
The Content Activity page provides a record of content deployment activity. It shows when a deployment occurred, who initiated it, which tenants were included, and the result of the deployment.
You can open the Content Activity page in either of the following ways:
- Click View Progress from the deployment notification.
- From User Content, click the Show Content Activity icon at the top of the page.
Filter Content Activity
Use the filters at the top of the Content Activity page to narrow the displayed records.
Filter | Description |
|---|---|
Date | Filters activity by date. Available options include Today, Last 7 days, Last 30 days, Last 90 days, and Custom date range. |
Title | Filters records by content package title. |
Status | Filters records by deployment status. |
Action | Filters records by the action performed. |
User | Filters records by the user who initiated the activity. |
Tenant | Filters records by tenant. |
The Status filter includes the following options:
Status | Description |
|---|---|
Success | The deployment completed successfully. |
Partially Successful | The deployment succeeded for some selected tenants but failed for others. |
Skipped | The deployment was skipped for the affected tenant or tenants. |
Needs Review | The deployment requires additional action because conflicting content was detected. |
Use Search to locate a specific activity record. Click the refresh icon to update the activity list.
Content Activity Details
The activity table contains the following columns:
Column | Description |
|---|---|
Date | Date and time of the activity. |
Title | Name of the content package. |
Action | Action performed on the package. |
Version | Version of the content package. |
Status | Current result of the activity. |
Tenants | Number of successful tenant deployments compared with the total number of selected tenants. For example, 3 of 3 or 2 of 5. |
User | User who initiated the activity. |
Click an activity record to view its deployment details.
Resolve Deployment Conflicts
If some or all selected content already exists in a destination tenant, the deployment displays a Needs Review status on the Content Activity page.
Click the deployment record to review the conflict.
The deployment details contain the following tabs:
- Needs Review
- Successful Deploys
- Deploy Inventory
The Needs Review tab displays the following message:
The tab contains the following information:
Column | Description |
|---|---|
Tenant | Tenant where conflicting content was detected. |
Conflicts | Describes the detected conflict. For example, Some or all selected content already exists. |
Deploy Action | Specifies how the conflict should be handled. Select Skip or Overwrite. |
For each conflicting tenant, select one of the following actions:
- Skip: Skips deployment of the conflicting content to the tenant.
- Overwrite: Overwrites the existing conflicting content with the content from the deployment package.
To apply the same action to all conflicting tenants, click Set All to Overwrite or Set All to Skip.
After selecting the appropriate action for each tenant, click Resolve.
Turbine continues the deployment using the selected conflict-resolution actions.
During multi-tenant conflict resolution, you cannot select or deselect individual conflicting entities before choosing Overwrite or Skip.
Review Deployment Results
The deployment details displayed from Content Activity depend on the result of the deployment.
Successful Deploys
The Successful Deploys tab lists tenants where the deployment completed successfully.
Column | Description |
|---|---|
Tenant | Tenant where the package was successfully deployed. |
Deploy Message | Displays the deployment result, such as Deployment Successful. |
Review Potential Issues | Indicates whether issues were identified during deployment. |
If no issues were detected, No Issues Found is displayed.
If an issue is available for review, click the review icon in the Review Potential Issues column.
Deploy Inventory
The Deploy Inventory tab lists the content included in the deployment package, such as applications, workspaces, playbooks, components, and other package entities.
This tab is available with the different deployment result states and provides a record of the content included in that deployment.
Successful Deployment
When the deployment completes successfully for the selected tenants, the deployment details contain:
- Successful Deploys
- Deploy Inventory
Use Successful Deploys to review the result for each tenant and Deploy Inventory to review the content included in the deployment.
Skipped Deployment
When a deployment is skipped, the deployment details display Deploy Skipped.
The window contains the following tabs:
Skipped Deploys
The Skipped Deploys tab lists the tenants where deployment was skipped.
Column | Description |
|---|---|
Tenant | Tenant where deployment was skipped. |
Deploy Message | Displays Deployment Skipped. |
Deploy Inventory
The Deploy Inventory tab lists the content associated with the deployment.
Partially Successful Deployment
A deployment is Partially Successful when content is successfully deployed to some selected tenants but fails for other tenants.
The deployment details contain the following tabs:
- Failed Deploys
- Successful Deploys
- Deploy Inventory
Failed Deploys
The Failed Deploys tab lists tenants where deployment failed.
Column | Description |
|---|---|
Tenant | Tenant where deployment failed. |
Deploy Message | Displays Deployment Failed. |
Expand a failed deployment to review additional error information when available.
Successful Deploys
The Successful Deploys tab lists the tenants where deployment completed successfully.
If a successful deployment contains potential issues, the Review Potential Issues column displays a review icon. Click the icon to review the identified issues.
Retry a Deployment
After reviewing and correcting the issues that caused a partial failure, click Retry.
Retry submits another deployment request so that the deployment can be attempted again after the issues are corrected.
Review Potential Issues
A package can deploy successfully while still containing issues that may require additional configuration.
From the Successful Deploys tab, click the review icon under Review Potential Issues.
The Review Potential Issues window displays:
You can also:
- Click copy the notes to copy the issue information.
- Click download to download the issue information.
The window contains the following tabs:
Take Action
The Take Action tab lists issues that require additional configuration or another user action.
Each issue identifies the affected package entity and describes the problem.
Click Resolve Issue to open the affected area and make the required configuration changes.
Depending on the issue, you may need to update content such as a playbook, component, asset, or another package entity.
Take Note
The Take Note tab lists issues that you should be aware of but that may not require an immediate configuration change.
Use this information to identify package content that may require additional review after deployment.
Re-enable Playbooks After Deployment
Some playbooks may be disabled during import when deployment issues are identified.
When this occurs, the Review Potential Issues window displays the following message:
After resolving the import issues, you can:
- Click Enable <number> Playbooks to enable the affected playbooks directly from the deployment results.
- Navigate to the affected playbooks and enable them manually.
The Take Note tab can also identify playbooks that were disabled during the import.
Reverting Content in Swimlane Turbine to a Previous Version
The Version History tab within a content package in Swimlane Turbine provides the option to revert content to a previous version if necessary. This feature allows you to undo updates and restore content to a specific earlier version while maintaining a clear log of changes.
Steps to Revert Content:
- Select a Version:
- In the Version History tab, select the version you want to revert to by clicking the corresponding radio button (for example, version 1.1.0).
- Click Revert:
- After selecting the desired version, click the Revert button.
- A dialog will appear with a summary of the version selected, the current version, and additional details (for example, commit message for the current version).
- Provide a Reason for Reverting:
- In the Additional Information section, provide a reason for reverting the content (for example, Content reverted in Library).
- User will also have the option to revise the new version number associated with this change.
- This reason will be logged and tracked for future reference.
- Confirm Reversion:
- Click Revert to proceed with the action.
- Once the content is reverted, you will see a success message indicating: Success! The content has been successfully reverted in your Library.
- Redeploy Notice: After reverting, you may see a Redeploy notice, indicating that the version in your Library might now be out of sync with the content in your tenants. You will need to redeploy the reverted content to your tenants.
Deleting Content in Swimlane Turbine
Swimlane Turbine provides a secure method for deleting content in the Turbine Library, ensuring that users understand the implications of the action and provide a reason for deletion. Below is a step-by-step process for deleting content:
Steps to Delete Content:
- Initiate Deletion:
- Navigate to the content you wish to delete (for example, CSC - Update Invoking Record).
- Open the delete option from the menu.
- Enter a Reason for Deletion:
- The Delete Content dialog box will appear, requiring you to provide a reason for deleting the content.
- Enter reason for deleting content: There is no default message for deletion, so the user must manually enter the reason. This helps in tracking the context for deletion in logs and reports.
- The Delete button remains disabled until a reason for deletion is provided.
- Confirm Deletion:
- After entering the reason, click Delete to proceed.
- A confirmation dialog will appear, stating that the action will delete the content and its entire history from your library and any connected remote repository.
- Click and hold the delete icon to confirm the action.
- Successful Deletion:
- After confirmation, a success message will appear indicating: Success! The content was successfully deleted.
Resetting the Turbine Library to a Previous Version
Swimlane Turbine allows users to reset their entire content library to a previous point in time. This feature is useful when a user needs to revert the library to a specific state, undoing any subsequent changes. Below are the steps for resetting the library.
Steps to Reset the Library:
- Access Library History: Click on the icon to Navigate to the Library History. This section shows all commit activities or changes made to the library along with the user who made the changes, the commit message, and the date of modification.
- Select the Commit: Select the commit at the point in time to which you want to reset the library. You can only select one commit at a time, and all other rows become disabled once a selection is made.
- Click Reset:
- Click the Reset button to begin the process. A dialog box will appear with information about the selected commit, including the date and commit message (for example, Bug fix).
- A warning message will appear stating that resetting will reset the Library to its previous state , and any changes made after the selected time will be reverted .
- Provide a Reason: Enter a reason for resetting the library in the Additional Information field. This will be logged to maintain a clear record of why the reset occurred.
- Confirm the Reset: To confirm, click and hold the reset button. A message will appear asking if you are sure you want to reset the library, along with the date and time of the selected version.
- Success Notification:
- After successfully resetting the library, a success message will appear: Success! Your Turbine library has been reset to its state as of {selected date and time}.
- A redeploy notice will appear, indicating that your content might be out of sync with tenants. You will need to manually redeploy the content to each tenant.
By combining these features with the Git integration options, you can now easily manage, track, and version control all of your Turbine content across tenants and environments.
See Publish Playbook and Publish components for details on how to publish either from their respective canvas's and homepages.