Turbine Upgrade Guide — Online 3-Node HA Embedded Cluster
Target release: Turbine 26.1.4 | Cluster type: Embedded (kURL) Kubernetes, 3 control-plane nodes, High Availability
About This Guide
Upgrading a 3-node HA embedded cluster happens in two distinct phases. Understanding the split up front makes the rest of the guide much easier to follow:
Phase | What gets upgraded | Where you work |
|---|---|---|
Phase 1 | Pre-upgrade validation — cluster health, storage, networking, connectivity | All three nodes |
Phase 2 | Infrastructure — Kubernetes, containerd, etcd, kURL add-ons | Driven from node-1, with scripts run on node-2 and node-3 |
Phase 3 | Turbine application — MongoDB compatibility, then the app itself | Admin Console UI (https://<SwimlaneDNS>:8800) |
Kubernetes is upgraded cumulatively: this cluster goes from 1.32.9 → 1.33.11 → 1.34.4. Every node completes 1.33.11 before any node starts 1.34.4. This is why the installer walks the cluster twice and why the process can take some time to complete.
Node Naming Used in the Examples
The screenshots in this guide come from a real cluster. Map them to your own hosts as follows:
Reference in this guide | Hostname in screenshots | IP in screenshots | Role |
|---|---|---|---|
node-1 (the driver node) | jer-turb | 10.x.x.x | control-plane, master |
node-2 | jer-turb1 | 10.x.x.x | control-plane, master |
node-3 | jer-turb2 | 10.x.x.x | control-plane, master |
node-1 is the node you SSH into first and where the main installer runs. It orchestrates the whole upgrade and hands you scripts to paste into the other two nodes.
Critical Rules — Read Before You Start
These are the mistakes that most often break an in-flight upgrade:
- Open an SSH session to all three nodes before you begin. You will be switching between them repeatedly, and there is no time to open a session mid-prompt.
- Never press Enter or Ctrl + C on node-1 while it is displaying a script for another node. Doing so terminates the upgrade partway through. Only select and copy the text.
- Take a verified backup first. Do not rely on an untested snapshot.
- If you use a proxy, firewall, or SELinux, you must append your override YAML file to every installer command, including the ones you paste into node-2 and node-3.
- Do not walk away during the final add-on phase. Pods restart during this stage, and a stuck pod will silently stall the upgrade until you intervene.
Red Hat 8 Is No Longer Supported Beginning With Turbine 26.1.4
As part of the Turbine 26.1.4 embedded cluster upgrades, Kubernetes is updated to version 1.33, which does not support Red Hat 8 (specifically, Linux kernel versions 4.18 and earlier). Customers with embedded clusters running Red Hat 8 must upgrade to Red Hat 9 before upgrading to Turbine 26.1.4.
Reference Documentation
Topic | Link |
|---|---|
Turbine 26.1.4 upgrade instructions | |
Backup and restore with snapshots | |
Overriding installer settings (proxy / firewall / SELinux) |
Phase 1 — Pre-Upgrade Validation
Complete every check in this phase before touching the installer. If any check fails, stop and resolve it — or contact Swimlane Technical Support — rather than pushing forward.
Step 1 — Read the Documentation and Take a Verified Backup
Start by reading the official upgrade instructions for the target release:
Then make sure you have a valid, verified backup taken before any upgrade activity. Follow the backup documentation:
https://docs.swimlane.com/turbine-installer/backup-and-restore-on-an-embedded-cluster-with-snapshots
Step 2 — Request the Pre-Upgrade Script from Swimlane Support
Ask Swimlane Technical Support to provide the pre-upgrade script. Run it on all Kubernetes nodes and send the results back to Swimlane Technical Support so they can review cluster health and confirm you are clear to proceed.
Step 3 — Confirm All Pods Are Running
kubectl get pods -ANote: Some pods will show 0/1. These are mostly Kubernetes or application jobs — confirm they are marked Completed rather than failing.
Example output:
NAMESPACE        NAME                                                           READY   STATUS      RESTARTS         AGE
default          cert-manager-7d87f5f494-xdmzq                                  1/1     Running     342 (34d ago)    137d
default          cert-manager-cainjector-85d6797c85-jw5l6                       1/1     Running     6 (34d ago)      34d
default          cert-manager-webhook-7c6bd4dd5d-26htx                          1/1     Running     4                34d
default          changestream-data-migration-29752575-45ccz                     0/1     Completed   0                11m
default          changestream-data-migration-29752580-7m4vv                     0/1     Completed
Step 4 — Confirm All Nodes Are Online and Ready
kubectl get nodes -AExample output:
root@jer-turb:\~\# kubectl get nodes \-A
NAME        STATUS   ROLES                  AGE    VERSION
jer-turb    Ready    control-plane,master   137d   v1.32.9
jer-turb1   Ready    control-plane,master   137d   v1.32.9
jer-turb2   Ready    control-plane,master   137d   v1.32.9
Note: The output must show three control-plane,master nodes, all in Ready status.
Step 5 — Confirm Kubernetes and containerd Versions Match Across Nodes
All nodes must run the same Kubernetes version and the same containerd version.
kubectl get nodes -owideExample output:
jer-turb    Ready    control-plane,master   137d   v1.32.9   10.x.x.x   \<none\>   Ubuntu 22.04.5 LTS   5.15.0-171-generic   containerd://1.7.29
jer-turb1   Ready    control-plane,master   137d   v1.32.9   10.x.x.x   \<none\>   Ubuntu 22.04.5 LTS   5.15.0-171-generic   containerd://1.7.29
jer-turb2   Ready    control-plane,master   137d   v1.32.9   10.x.x.x   \<none\>   Ubuntu 22.04.5 LTS   5.15.0-181-generic   containerd://1.7.29
Step 6 — Confirm Every Partition Is Below 75% Used
Run this on each node:
df -h | head -n 30Example output:
root@jer-ubuntu:\~\# df \-h | head \-n 30
Filesystem      Size  Used Avail Use% Mounted on
tmpfs           6.3G  1.3M  6.3G   1% /run
/dev/sda2        49G   13G   35G  27% /
tmpfs            32G     0   32G   0% /dev/shm
tmpfs           5.0M     0  5.0M   0% /run/lock
/dev/sda4        98G   24K   93G   1% /var/lib/containerd
/dev/sda5        98G   24K   93G   1% /var/lib/kubelet
/dev/sda3       295G   28K  280G   1% /var/openebs
tmpfs           6.3G  4.0K  6.3G   1% /run/user/1000
Note: If any partition is above 75%, report it to Swimlane Support so they can help review the environment, or reach out to your Linux team to increase the space before attempting the upgrade.
Step 7 — Verify Proxy Configuration (If a Proxy Is in Use)
If a proxy exists in the environment, confirm that no_proxy is exported and populated. A missing no_proxy will block the upgrade.
env | grep -i proxyExample output:
http\_proxy="http://proxy.example.com:8080"
https\_proxy="http://proxy.example.com:8080"
no\_proxy="localhost,127.0.0.1,.example.com"
HTTP\_PROXY="http://proxy.example.com:8080"
HTTPS\_PROXY="http://proxy.example.com:8080"
NO\_PROXY="localhost,127.0.0.1,.[example.com](http://example.com)"
Step 8 — Check Firewall Status
If the environment does not use a firewall, a disabled or inactive result is fine — just note it and move on.
sudo systemctl status firewalld # For Red Hat, Rocky Linuxsudo ufw status # For UbuntuStep 9 — Verify Connectivity to the Load Balancer
Run this from every node:
curl -vk https://<load_balancer_fqdn_or_ip_address>:6443The expected result is a successful connection with no HTTP errors. If this fails, the kube-apiserver will fail during the upgrade.
Step 10 — Verify etcd Health
for pod in $(kubectl get pods -l component=etcd -n kube-system -o jsonpath='{.items[*].metadata.name}')
do
  echo "### etcd pod : ${pod} ###"
  kubectl -n kube-system exec ${pod} -- /bin/sh -c "ETCDCTL_API=3 etcdctl --cert=/etc/kubernetes/pki/etcd/server.crt --key=/etc/kubernetes/pki/etcd/server.key --cacert=/etc/kubernetes/pki/etcd/ca.crt endpoint health"
done
Note: Every endpoint must report healthy. If not, the upgrade will fail — report this to Swimlane Technical Support before continuing.
Step 11 — Verify Flannel VXLAN Connectivity on Port 8472
Test connectivity between nodes on the Flannel overlay port. Run this from one node toward another:
nc -u -l 8472 <destination_node_IP_address>The result should be successful. Note: nc holds the connection for a few seconds and then disconnects — that is expected behaviour, not a failure.
Step 12 — Check SELinux Status
sestatusIf SELinux is enabled, it must be disabled or set to permissive mode. Open /etc/selinux/config in an editor and set:
SELINUX=permissiveStep 13 — Create an Installer Override YAML (Proxy, Firewall, or SELinux Only)
If any proxy or firewall is enabled in your environment, you need an override YAML patch file that declares both the firewall and the proxy, so that installation packages can bypass them and download successfully.
Follow the official documentation to build the file:
Note: After creating the YAML file, place it on each node, in the same location the upgrade script will be run from. You will reference it in Steps 16, 24, 29, 34, and 36.
Phase 2 — Infrastructure Upgrade (Kubernetes and kURL)
You are now beginning the upgrade itself, following the steps in the upgrade documentation:
Step 14 — SSH Into node-1
SSH into any node in your deployment. That node becomes node-1 for the rest of this guide — the node that drives the upgrade.
Make sure your SSH sessions to node-2 and node-3 are also open and ready.
Step 15 — Scale Down EKCO and kotsadm-rqlite
kubectl -n kurl scale deployment ekc-operator --replicas=0
kubectl -n default scale statefulset kotsadm-rqlite --replicas=0
Note: EKCO and kotsadm-rqlite scale back up automatically once the script completes. No manual action is required afterwards.
Step 16 — Run the Turbine Platform Installer Upgrade on node-1
curl -sSL https://kurl.sh/turbine-turbine-26-1-4 | sudo bash -s haNote: If SELinux, a firewall, or a proxy is configured, append your override YAML file (the one you created in Step 13) to the command:
installer-spec-file=se.yamlStep 17 — Accept the Initial Prompt
The installer downloads kurl-bin-utils and checks whether a firewall, SELinux, or swap is enabled. It also reports the version transition — in this example, Kubernetes 1.32.9 → 1.34.4.
Note: At this point, all pods in the kurl namespace must be running; otherwise, the upgrade will halt.
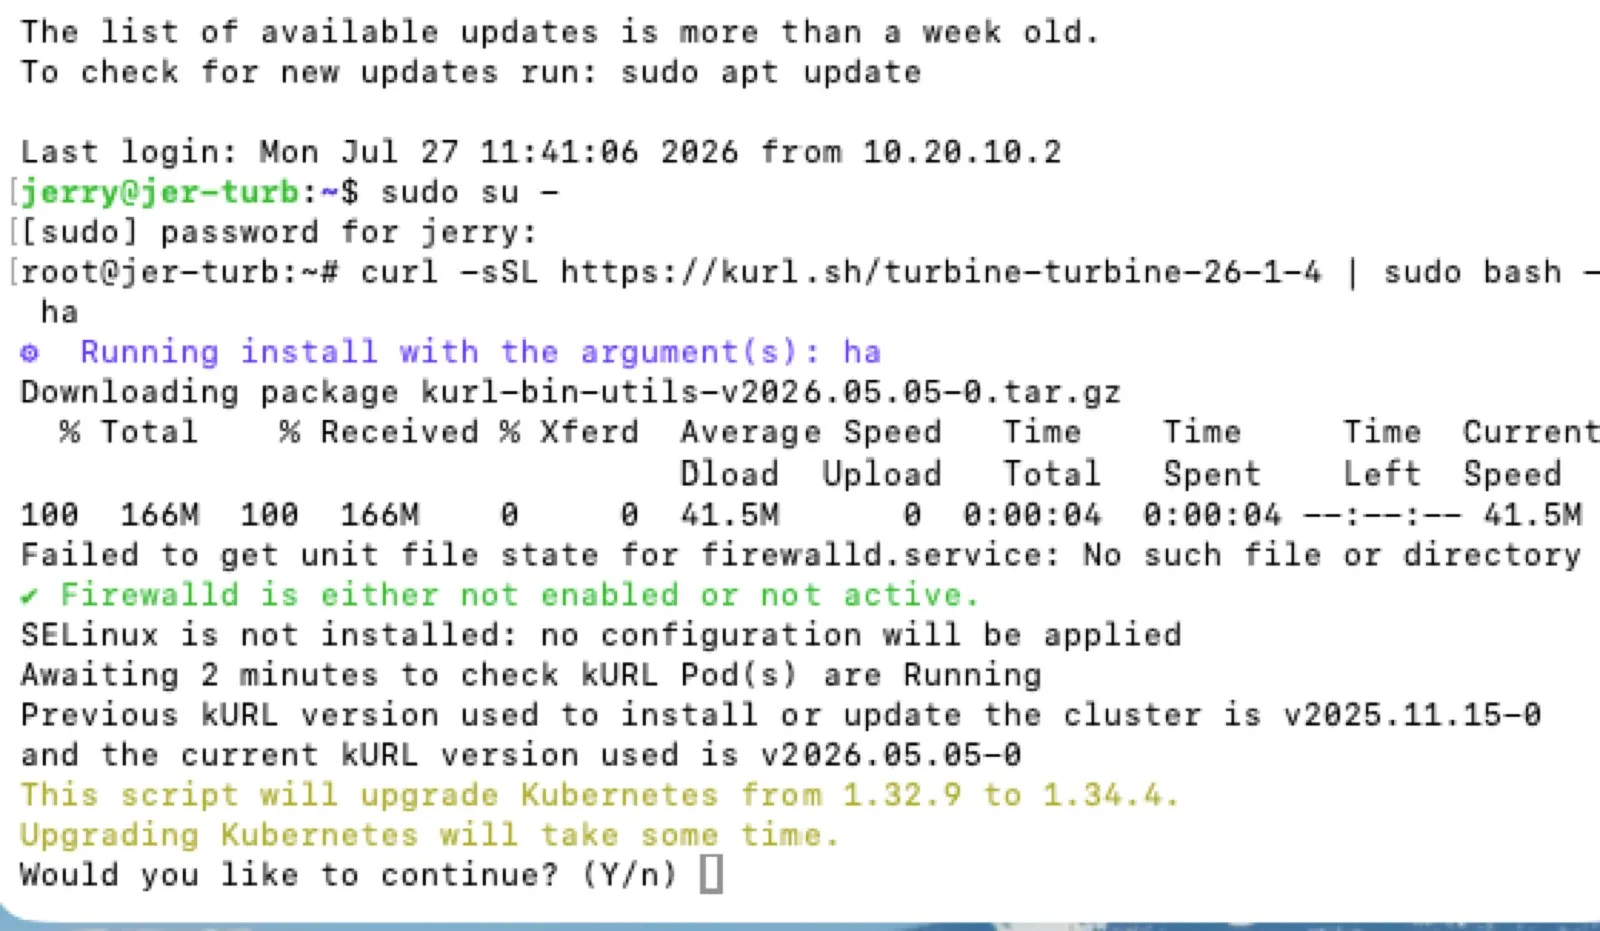
Installer startup — checks firewall/SELinux/swap and confirms the Kubernetes 1.32.9 to 1.34.4 upgrade path
Accept the prompt with Y and continue.
Step 18 — Wait for Package Download
The installer now downloads all the new packages. No action is needed.
Step 19 — Review the Preflight Check Results
After the download, the installer runs preflight checks. All checks should pass, as in the output below:
[PASS] Certificate Key Pair: Kubernetes API key pair certificate is valid [PASS] Certificate Key Pair: Kubernetes ETCD key pair certificate is valid [PASS] Kubernetes API Health: OK HTTP status response from Kubernetes API at https://localhost:6443/healthz [PASS] Number of CPUs: This server has at least 4 CPU cores [PASS] Amount of Memory: The system has at least 8G of memory [PASS] Ephemeral Disk Usage /var/lib/kubelet: The disk containing directory /var/lib/kubelet has at least 30Gi of total space, has at least 10Gi of disk space available, and is less than 60% full [PASS] Ephemeral Disk Usage /var/lib/containerd: The disk containing directory /var/lib/containerd has at least 30Gi of total space, has at least 10Gi of disk space available, and is less than 60% full. [PASS] Ephemeral Disk Usage /var/openebs: The disk containing directory /var/openebs has sufficient space [PASS] Kubernetes API Server Load Balancer Upgrade: OK HTTP status response from load balancer at https://10.33.102.118:6443/healthz [PASS] NTP Status: System clock is synchronized [PASS] Host OS Info: containerd addon supports ubuntu 22.04 [PASS] Can Access Replicated API: Connected to https://replicated.app [PASS] Host OS Info: containerd addon supports ubuntu 22.04 ✔ Host preflights success ⚙ Running in cluster Preflights Host and in-cluster preflight checks all pass
Note: The ephemeral disk storage message relates to the /var/lib/kubelet partition. It can be safely ignored and will not fail the upgrade.
Step 20 — Approve Draining node-1
The installer prepares to upgrade the components, including Kubernetes. To upgrade the components, all pods on the node must be drained. It first displays the component version table for the v1.32 → v1.33.11 step, then asks for confirmation.
Accept the drain by entering Y:
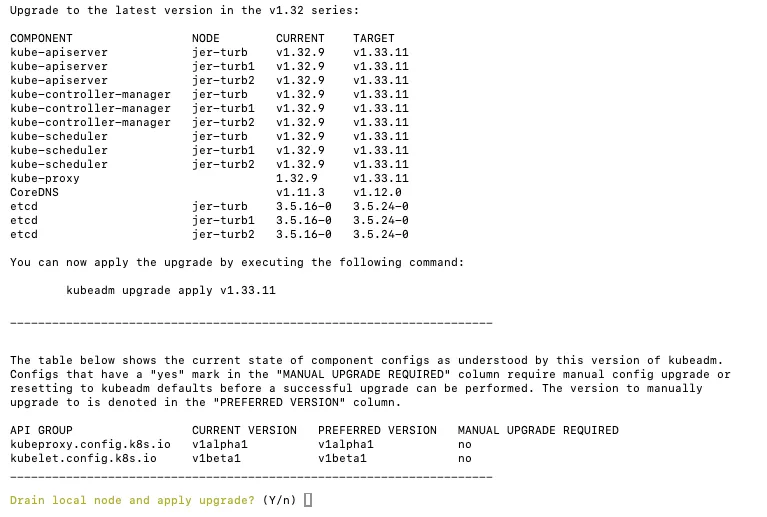
Component upgrade table for v1.33.11 followed by the “Drain local node and apply upgrade?” prompt
Step 21 — Expect Pod Disruption Budget Errors During the Drain
While draining the node, the installer may repeatedly display cannot evict pod as it would violate the pod's disruption budget:
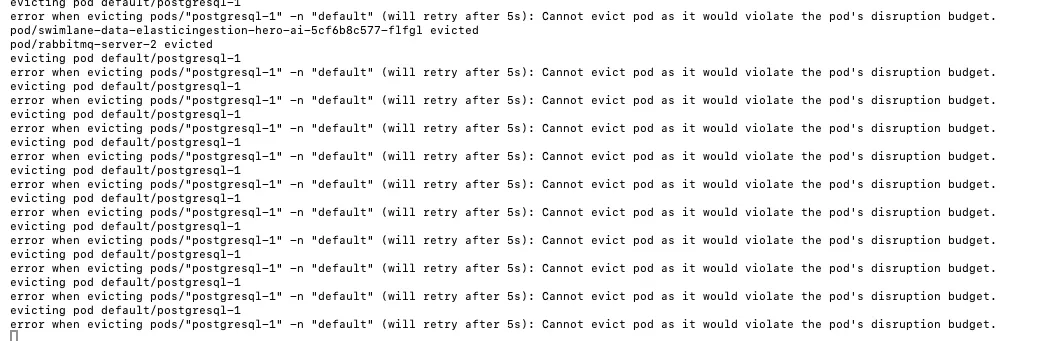
Repeated pod disruption budget eviction errors for postgresql-1 during node drain
This message is normal and will not fail the upgrade. By default, some StatefulSet pods — such as the PostgreSQL pods — have a pod disruption budget configured.
Step 22 — Expect “Unable to Fix Broken Packages” and Approve the node-2 Drain
You may see an Unable to fix broken packages error. This is an OS package installation message and can be ignored — it will not fail the upgrade.
Immediately after node-1 finishes, you will be prompted to drain node-2. Enter Y to proceed:

Broken packages message, node-1 upgraded to Kubernetes 1.33.11, and the drain prompt for jer-turb1
Step 23 — node-2 Drains Automatically
After you enter Y, the installer drains node-2 and continues with the installation.
Step 24 — Copy the Upgrade Script from node-1 to node-2
The installer now prints a script for you to run on node-2.
Critical: While copying the upgrade script from node-1 to node-2, do not press Enter or Ctrl + C — either will terminate the upgrade partway through. Simply select the script text from the output and paste it into the node it is asking for.
Run the upgrade script on the remote node to proceed:
curl -fsSL https://kurl.sh/version/v2026.05.05-0/turbine-turbine-26-1-4/upgrade.sh | sudo bash -s kubernetes-version=1.33.11 docker-registry-ip=10.96.3.220 primary-host=10.33.102.115 primary-host=10.33.102.116 primary-host=10.33.102.117Note: If you are upgrading with a firewall, SELinux, or a proxy, append your installer override YAML file to the end of the script before running it on node-2. Example:
curl -fsSL https://kurl.sh/version/v2026.05.05-0/turbine-turbine-26-1-4/upgrade.sh | sudo bash -s kubernetes-version=1.33.11 docker-registry-ip=10.96.3.220 primary-host=10.33.102.115 primary-host=10.33.102.116 primary-host=10.33.102.117 installer-spec-file=override.yamlStep 25 — Run the Script on node-2
Paste the copied script into your node-2 session and run it:

The upgrade script pasted and running in the node-2 (jer-turb1) terminal
Step 26 — Wait While node-2 Upgrades
The installer shuts down all Kubernetes pods on node-2 while installing Kubernetes and the required components. Kubelet restarts all components once that upgrade finishes. This process can take a while:
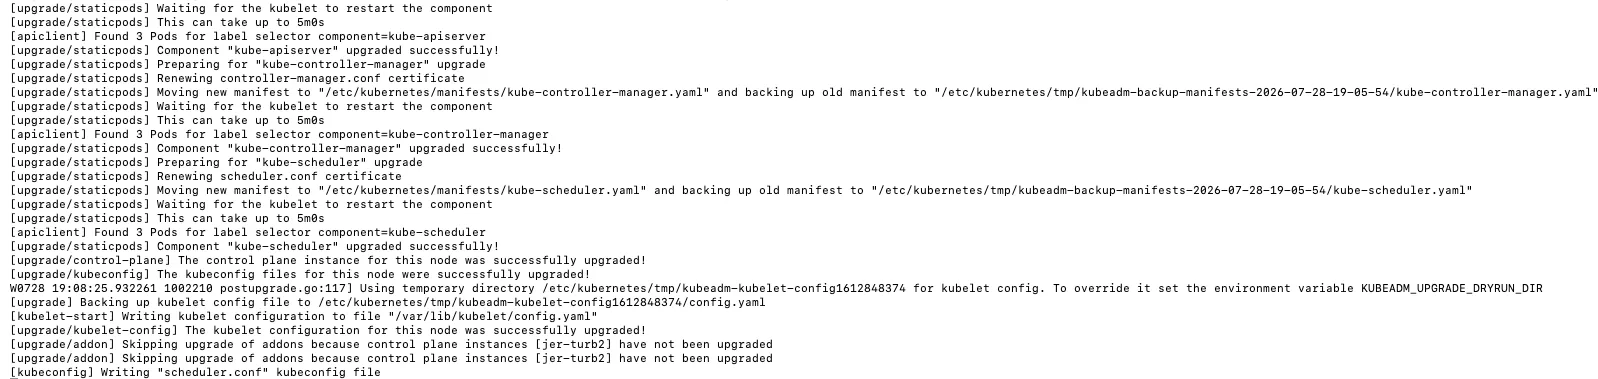
Static pod upgrade output on node-2 — kube-apiserver, kube-controller-manager, and kube-scheduler upgraded
Step 27 — Confirm node-2 reached Kubernetes 1.33.11
Wait until installation is complete on node-2:
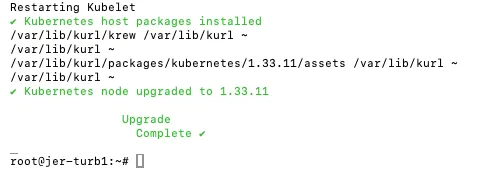
node-2 reports “Kubernetes node upgraded to 1.33.11” and “Upgrade Complete”
Step 28 — Approve the node-3 Drain on node-1
Back on node-1, the script continues and prompts you to drain node-3, exactly as it did for node-2:
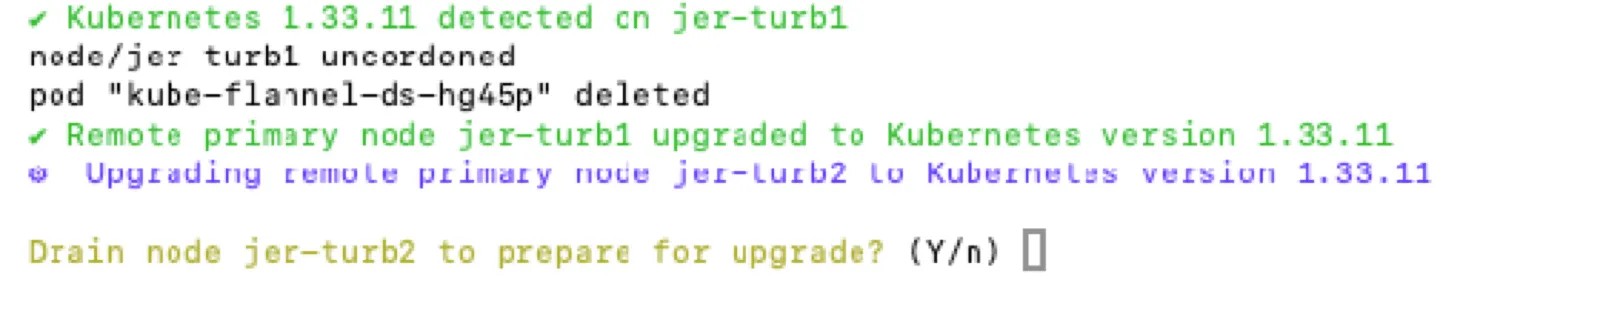
node-1 confirms jer-turb1 is upgraded and prompts to drain jer-turb2
Step 29 — Copy the Upgrade Script from node-1 to node-3
node-1 now prints a script to run on the third node.
Critical: Do not press Enter or Ctrl + C on node-1 — just copy the script. Remember to append your override YAML file if needed, exactly as described in Step 24.

node-1 displaying the upgrade script to run on the remote node jer-turb2
Step 30 — Wait for node-3 to complete
Installation begins on node-3, downloading the upgrade packages and completing the upgrade:

node-3 reports “Kubernetes node upgraded to 1.33.11” and “Upgrade Complete”
Step 31 — node-1 Begins the Kubernetes 1.34.4 Upgrade
All three nodes are now on 1.33.11. node-1 continues with the upgrade to Kubernetes 1.34.4 and drains itself to begin upgrading Kubernetes and the required components:
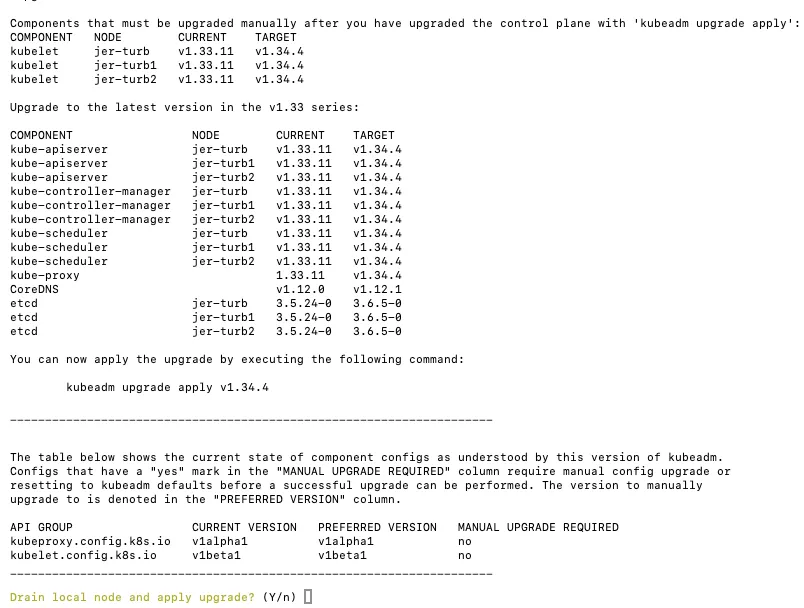
Component upgrade table for v1.34.4 followed by the “Drain local node and apply upgrade?” prompt
Step 32 — Approve the node-1 Drain
Enter Y to drain node-1 and start the upgrade.
Why the upgrade walks the cluster twice: Version 25.5.1 shipped Kubernetes 1.32.9, and version 26.1.4 ships Kubernetes 1.34.4. Kubernetes only supports cumulative upgrades, so the cluster must reach 1.33 before it can move to 1.34.4. The upgrade script therefore upgrades Kubernetes on all three nodes to 1.33.11 first, then repeats the walk for 1.34.4.
Step 33 — Approve the node-2 Drain for 1.34.4
Once Kubernetes and the required components are upgraded on node-1 to 1.34.4, you are prompted to drain node-2:

node-1 upgraded to Kubernetes 1.34.4, with the drain prompt for jer-turb1
Step 34 — Run the Script on node-2 for 1.34.4
You are prompted to copy the upgrade script from node-1 and run it on node-2, exactly as described in Step 24. Do not press Enter on node-1, and remember to add your YAML file if needed.
node-2 then completes its Kubernetes upgrade to 1.34.4:
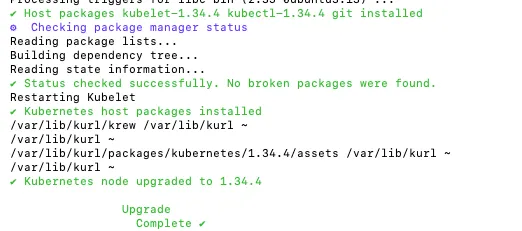
node-2 reports “Kubernetes node upgraded to 1.34.4” and “Upgrade Complete”
Step 35 — Approve the node-3 Drain for 1.34.4
The upgrade continues on node-1 and you are prompted to drain node-3. Press Enter to drain node-3 and obtain the script that upgrades its Kubernetes to 1.34.4:
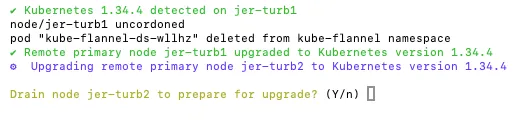
jer-turb1 confirmed at 1.34.4, with the drain prompt for jer-turb2
Step 36 — Run the Script on node-3 for 1.34.4
Copy the script from node-1 and run it on node-3 when prompted, following the same instructions as Step 24.
Once node-3’s Kubernetes upgrade completes, node-1 continues to finalise the upgrade:
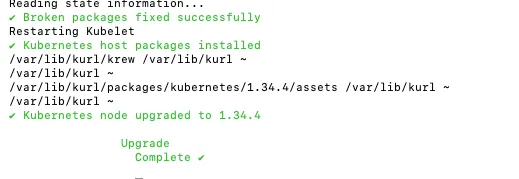
node-3 reports “Kubernetes node upgraded to 1.34.4” and “Upgrade Complete”
Kubernetes is now upgraded on all three nodes. Other component (add-on) upgrades still remain. node-1 completes its add-ons first, then provides a single script to run on both node-2 and node-3 at the same time.
Step 37 — Monitor node-1 for Stuck Pods During the Add-On Phase
Important: Kubernetes pods are restarted during this final upgrade phase, so keep monitoring the progress on node-1.
If the upgrade stays on one component for a long time with no movement, it means a pod is failing to restart on the node. To resolve it, SSH to the node and use kubectl to find the affected pod, then forcibly terminate it. For example:
kubectl get pods -n kurlIf the ekc pod is stuck in Terminating, delete it:
kubectl delete pod ekc-XXX --force -n kurlThe upgrade will then continue.
Step 38 — Run the Final Script on node-2 and node-3
The upgrade is now complete on node-1, and you are prompted to run a script on the other two nodes:

node-1 displaying the final “Run this script on all remote nodes to apply changes” command

Add-on unpacking completing on the remote nodes with “Upgrade Complete”
Step 39 — Finish the Infrastructure Upgrade
Wait until the upgrade is complete on both node-2 and node-3.
Then return to node-1 and press Enter to proceed. The Kubernetes and kURL component upgrade is now complete:
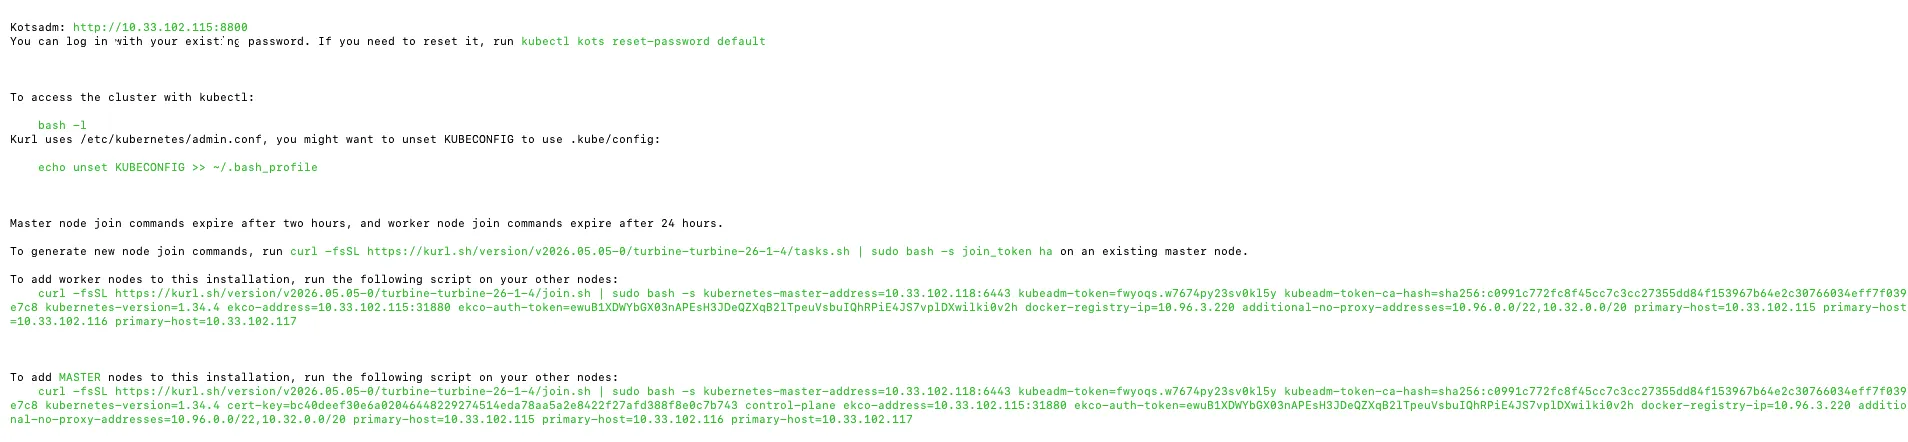
Final installer output showing the Kotsadm URL, kubectl access instructions, and the node join commands
Phase 3 — Turbine Application Upgrade
Prerequisite — Set the MongoDB Feature Compatibility Version (Applies to upgrades to Turbine 26.x and SPI 10.25.x onwards)
Step 1 — Connect to MongoDB as an Admin
Replace default with your actual namespace if it differs.
kubectl -n default exec -it mongo-0 -- mongosh -u Admin -p $(kubectl -n default get secret mongo-admin -o jsonpath="{.data.password}" | base64 --decode) --authenticationDatabase admin --tls --tlsAllowInvalidCertificates adminNote: The command above normally logs you into the MongoDB shell without prompting. If you are prompted for the MongoDB admin password, enter it. You will land in the MongoDB shell as shown below:

mongosh connected to the replica set, showing the rs0 [direct: primary] admin> prompt
Step 2 — Check the Current MongoDB Version
use admin
db.system.version.find()
Expected output:
rs0 [direct: primary] admin> use admin db.version() already on db admin rs0 [direct: primary] admin> db.system.version.find() [ { _id: 'featureCompatibilityVersion', version: '6.0' }, { _id: 'authSchema', currentVersion: 5 } ] rs0 [direct: primary] admin>
Step 3 — Verify the Feature Compatibility Version
Read the featureCompatibilityVersion value from the output above. In this example it is 6.0, which is below the required 7.0 — so it must be updated.
Step 4 — Update the Feature Compatibility Version if It Is Below 7.0
db.adminCommand({ setFeatureCompatibilityVersion: '7.0' })Expected output after the change:
rs0 [direct: primary] admin> use admin db.version() already on db admin rs0 [direct: primary] admin> db.system.version.find() [ { _id: 'featureCompatibilityVersion', version: '7.0' }, { _id: 'authSchema', currentVersion: 5 } ] rs0 [direct: primary] admin>
Re-run db.system.version.find() to confirm the value now reads 7.0 before continuing.
Complete the Turbine Application Upgrade from the Admin Console
Step 1 — Log In and Note the Current Version
Log in to the Turbine Platform Installer dashboard:
https://<SwimlaneDNS>:8800
Take note of the currently deployed version shown on the Dashboard — in this example, 25.5.1_971:
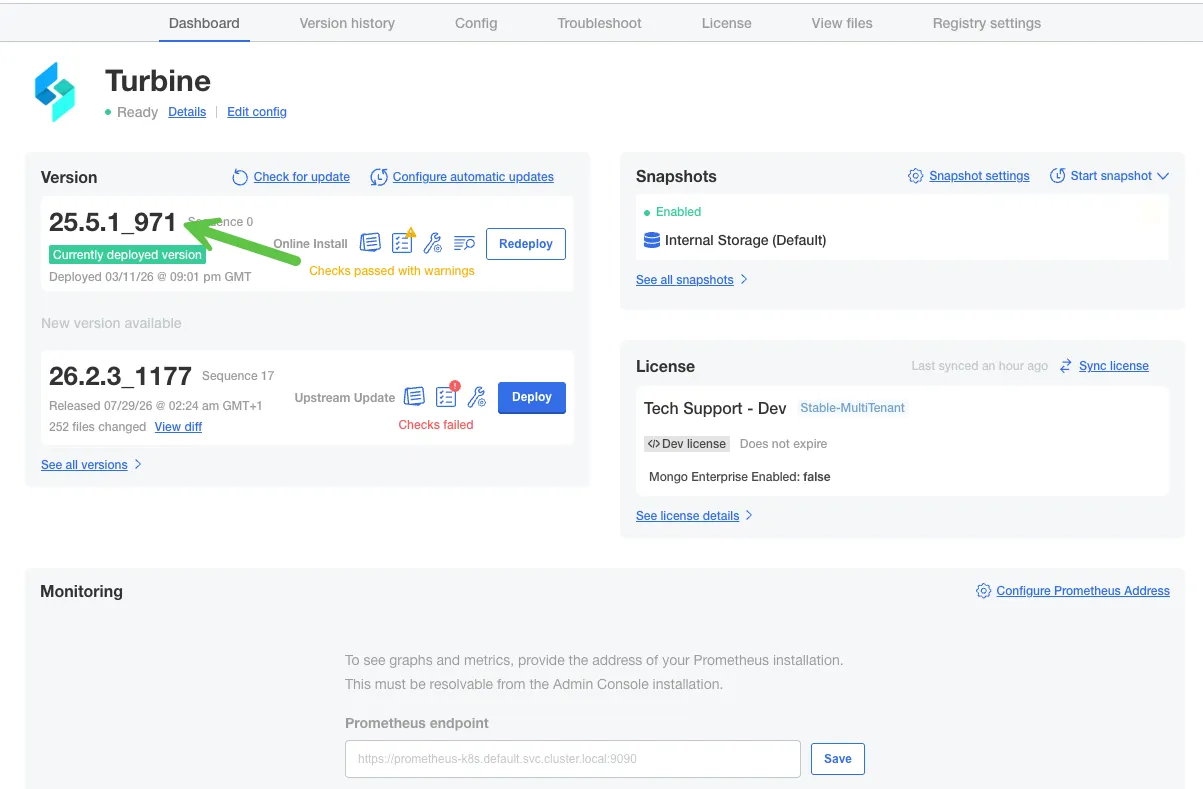
Admin Console Dashboard showing the currently deployed version 25.5.1_971
Step 2 — Check for Updates and Run the Preflight Checks
Click the Version history tab, then click Check for update:
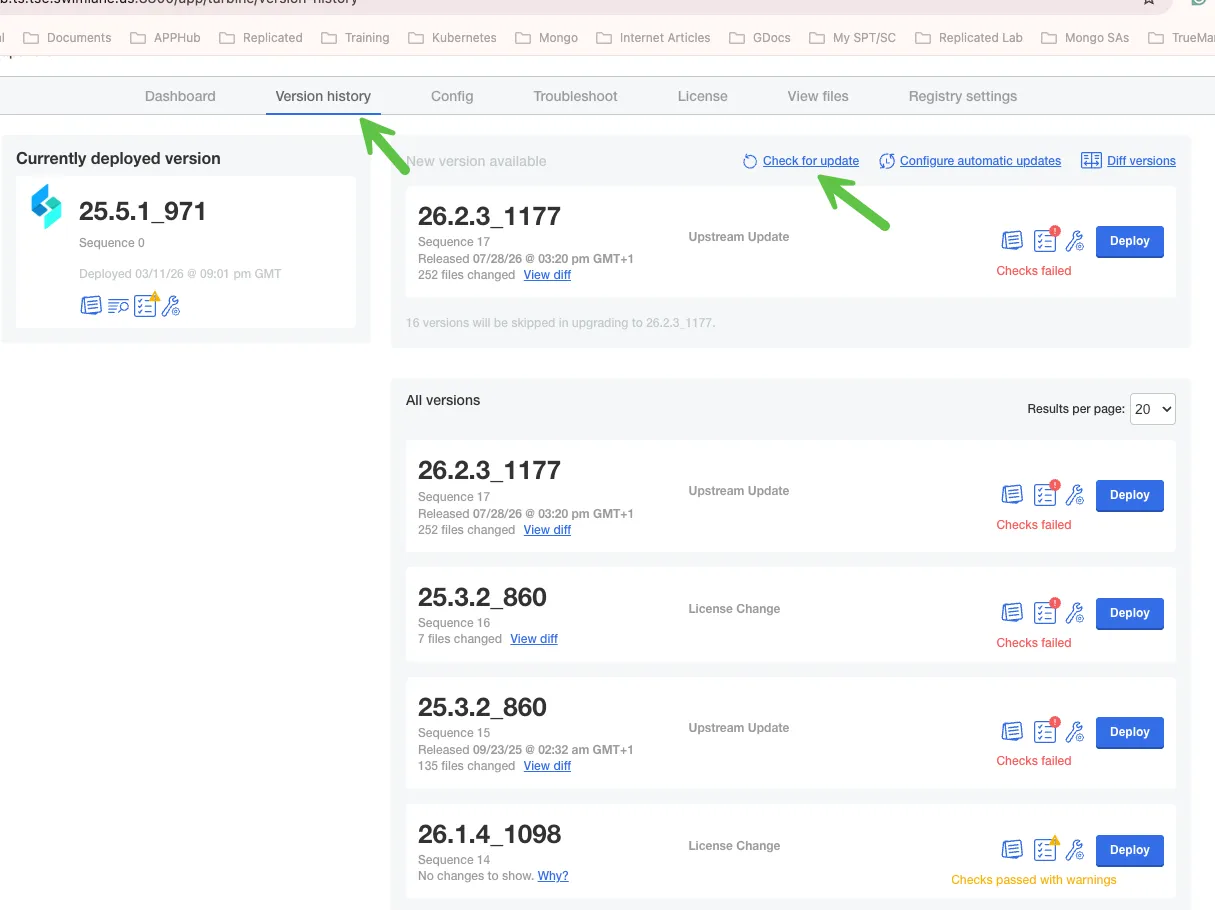
Version history tab with the Check for update link highlighted
In the pop-up window, click Go to the updated version, then click the preflight check icon on the version you intend to deploy:
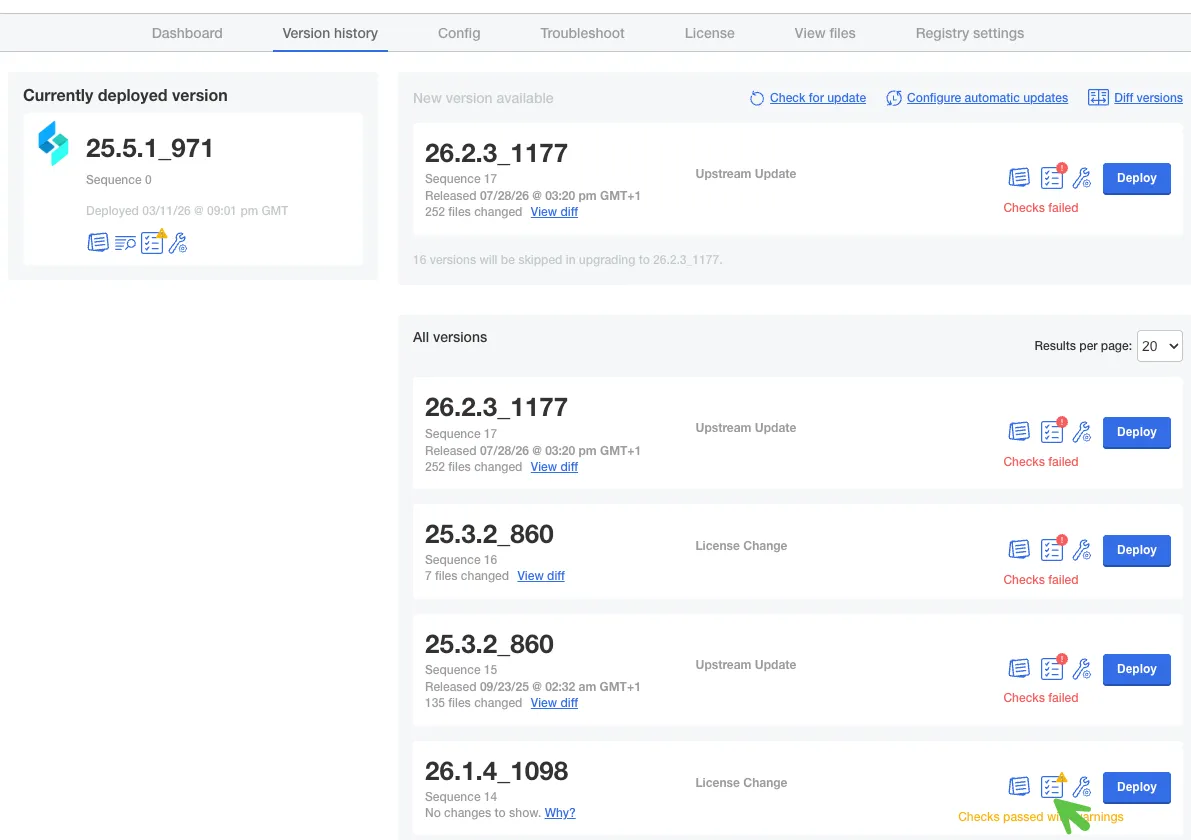
Version history list with the preflight check icon highlighted on the 26.1.4_1098 row
The expected preflight check results are shown below:
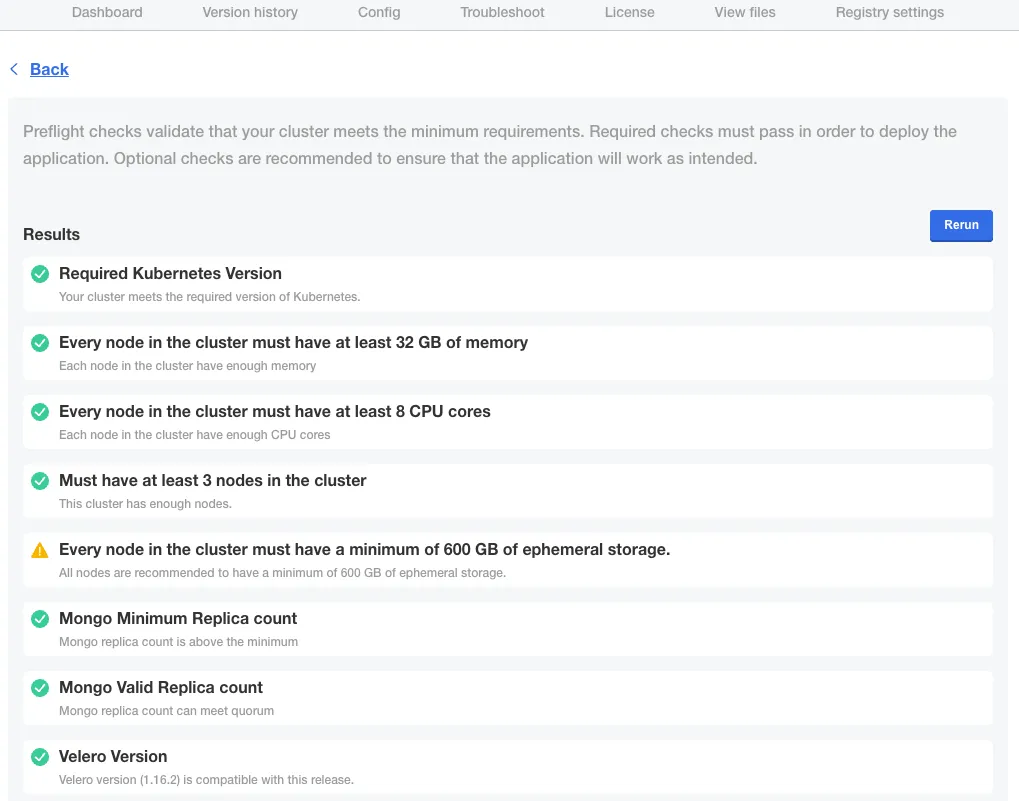
Preflight check results — all required checks passing, with an ephemeral storage warning
Note: The Ephemeral Storage caution can be ignored if your Velero backup size is less than 600 GB. This check refers to the size of /var/lib/kubelet.
Step 3 — Deploy the Target Application Version
Click Deploy on your required version with the highest sequence number. In this example, we are deploying version 26.1.4_1098 (Sequence 14):
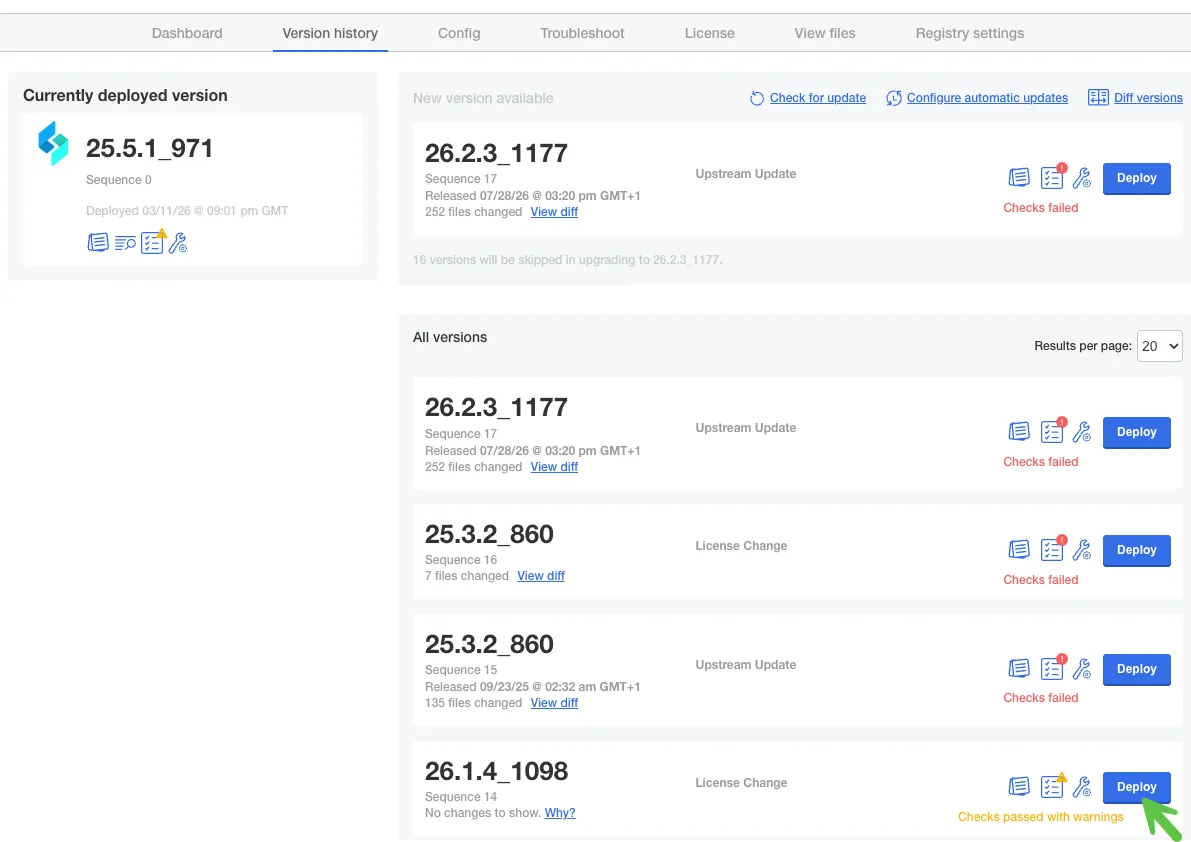
Deploy button highlighted on the 26.1.4_1098 row in Version history
Step 4 — Monitor the Deployment
Click the Dashboard tab to monitor the progress of the deployment:
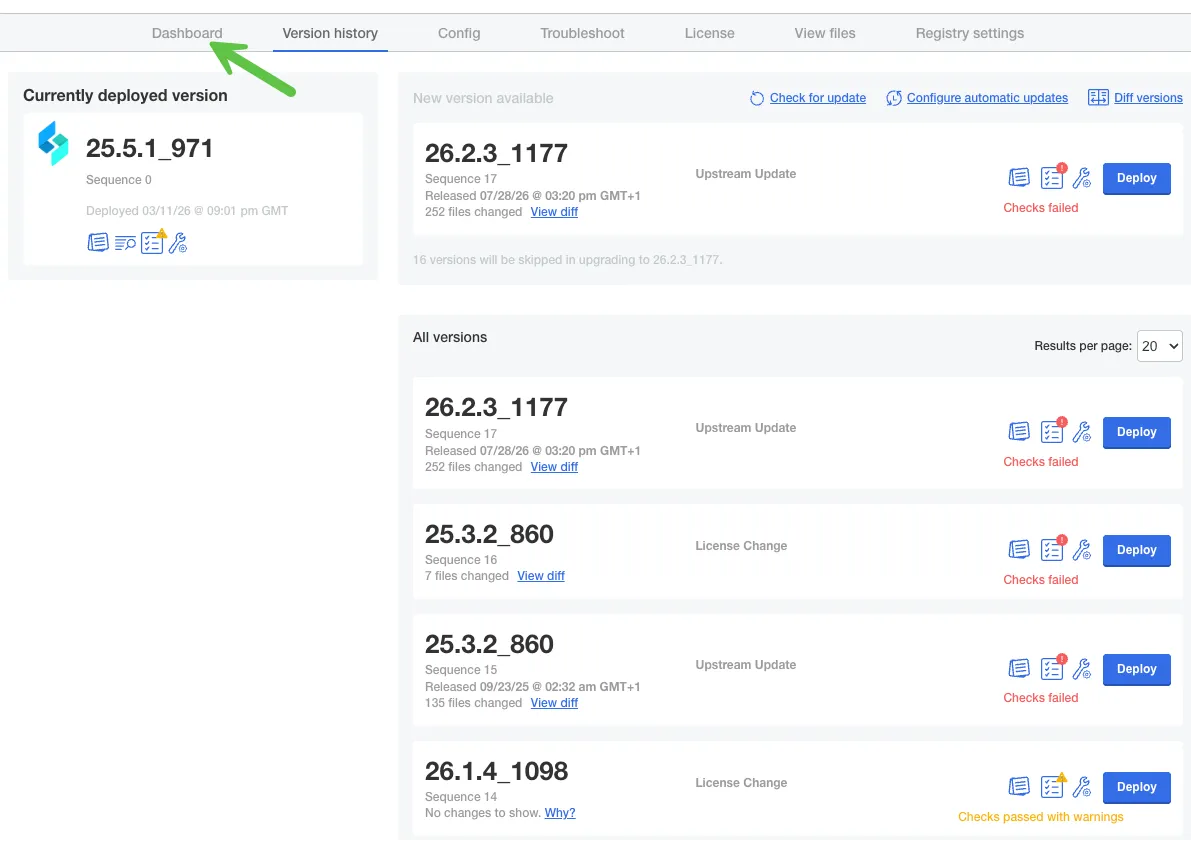
Dashboard tab highlighted in the Admin Console navigation
You will see the newly deployed version shown in green:
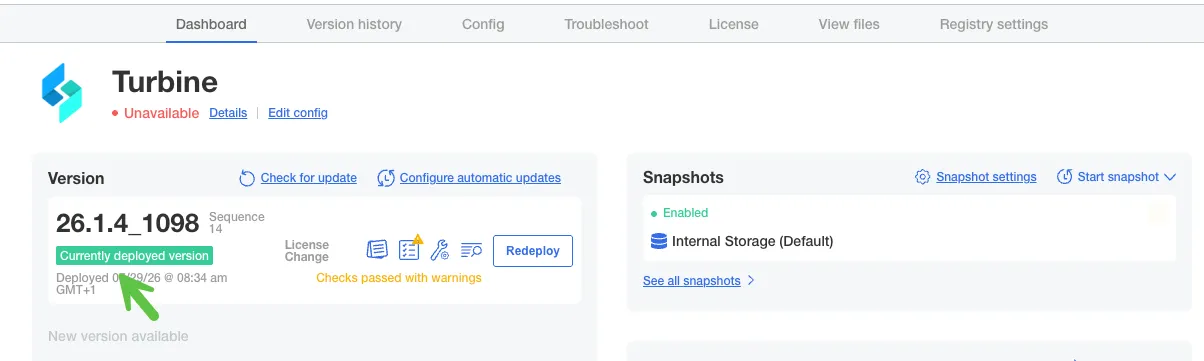
Dashboard showing 26.1.4_1098 as the currently deployed version
A green version badge does not mean the upgrade is finished. To see which component is currently being upgraded, click the Details link:
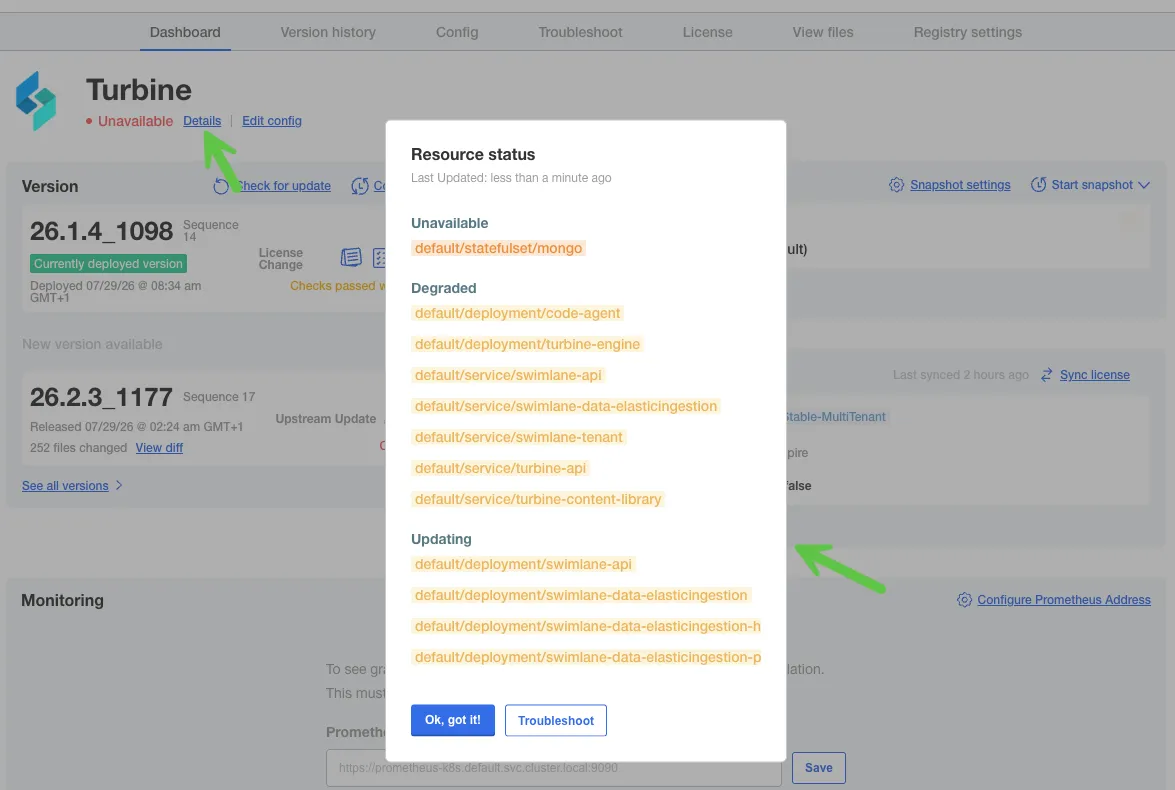
Resource status panel showing Unavailable, Degraded, and Updating workloads mid-upgrade
You can also watch progress from the command line:
kubectl get pods -wkubectl get pods -w | grep -v RunningThe upgrade is complete once the application status shows Ready:
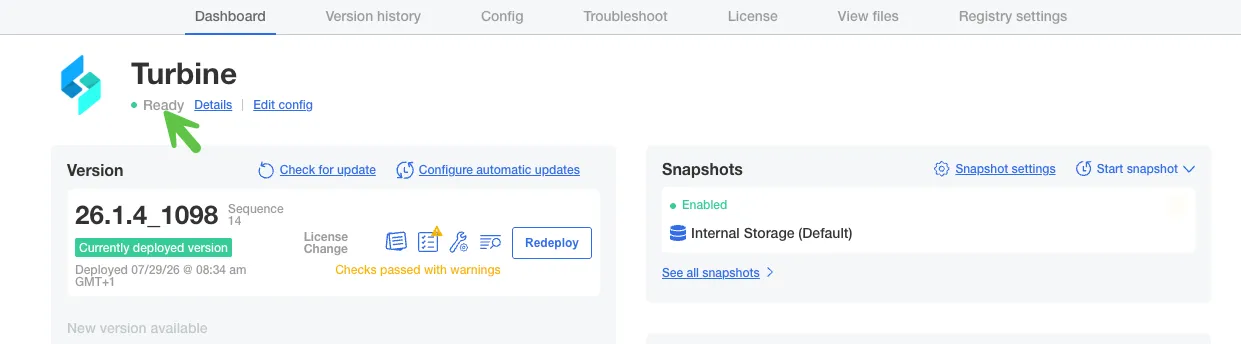
Admin Console Dashboard showing the application status as Ready on version 26.1.4_1098
You can confirm the same from the command line:
kubectl get pods -AStep 5 — Verify the Version in the Turbine UI
Log in to the Turbine application UI and check the version. You should now see the upgraded version:
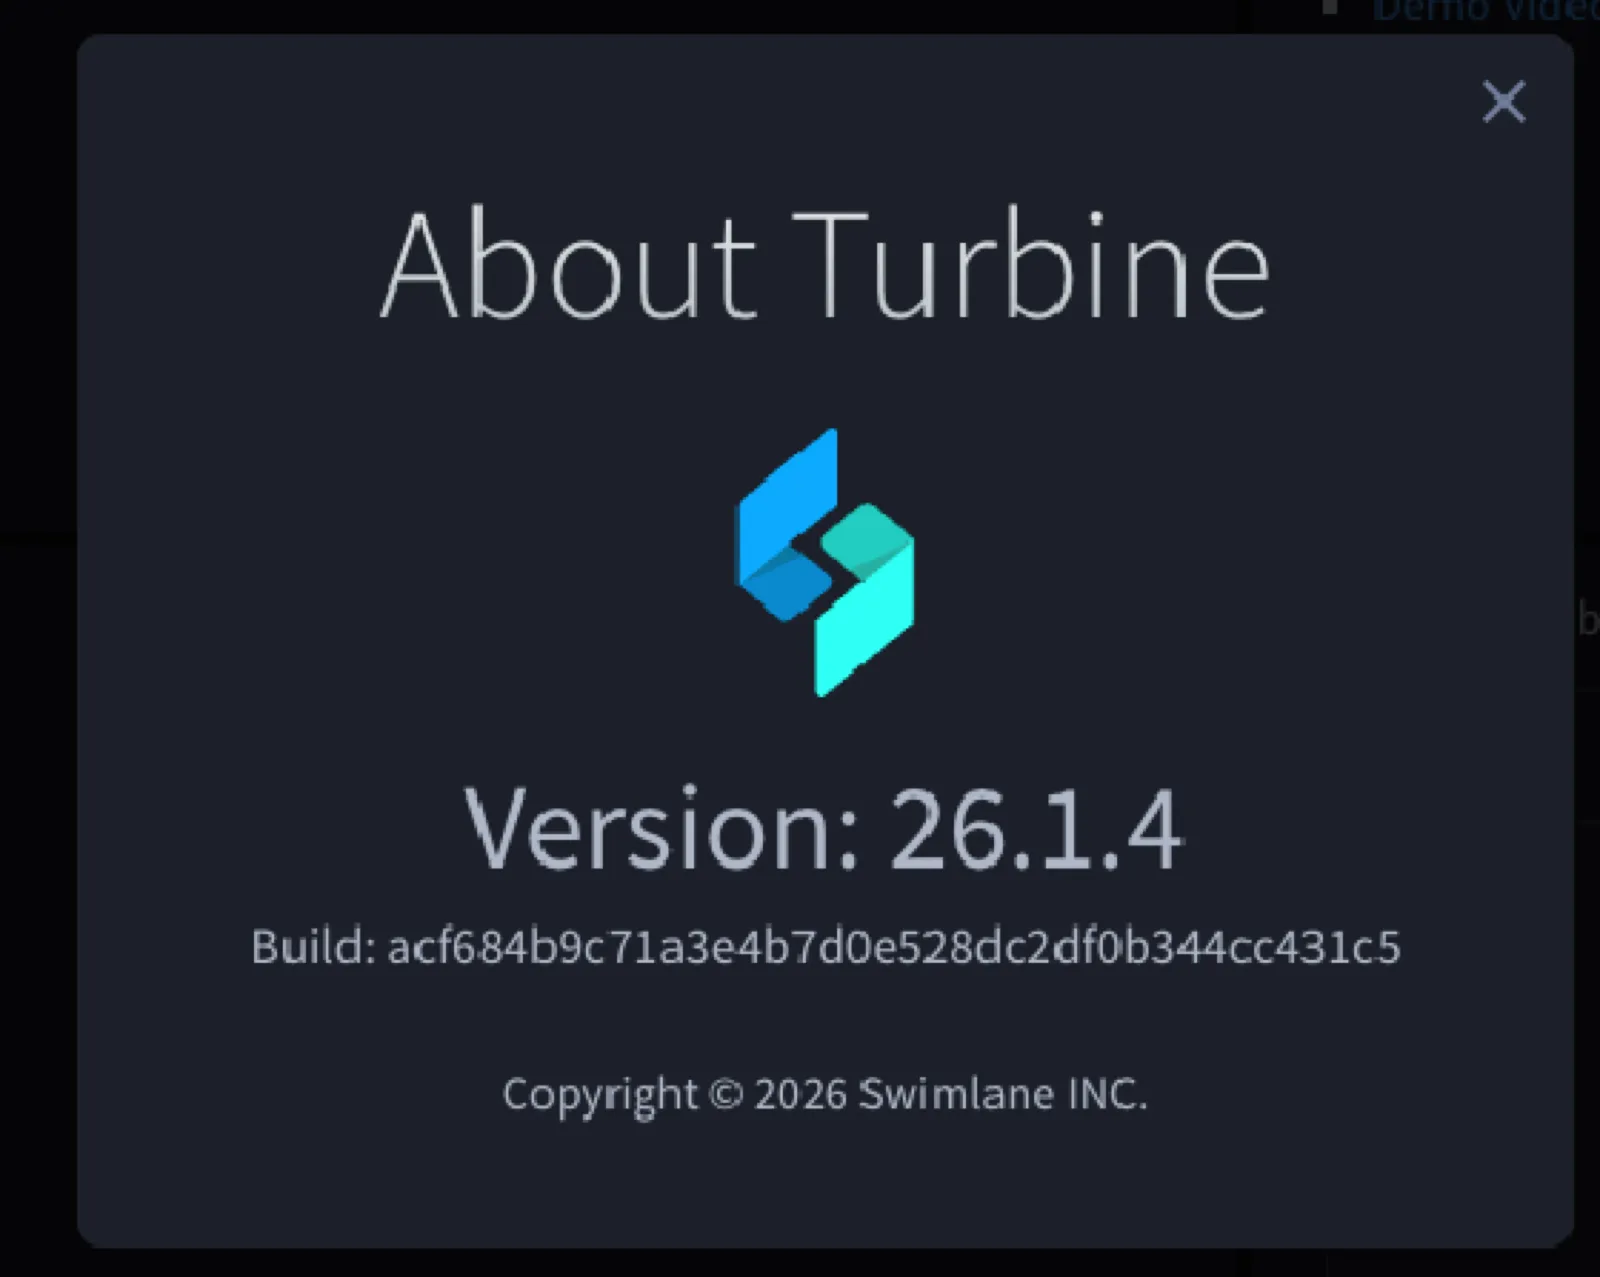
About Turbine dialog showing Version 26.1.4
Appendix A — Version Reference
Component | Before (Turbine 25.5.1) | Intermediate | After (Turbine 26.1.4) |
|---|---|---|---|
Turbine | 25.5.1_971 | — | 26.1.4_1098 |
Kubernetes | 1.32.9 | 1.33.11 | 1.34.4 |
etcd | 3.5.16-0 | 3.5.24-0 | 3.6.5-0 |
CoreDNS | 1.11.3 | 1.12.0 | 1.12.1 |
MongoDB FCV | 6.0 | — | 7.0 (minimum) |
kURL | v2025.11.15-0 | — | v2026.05.05-0 |
Appendix B — Expected Messages You Can Safely Ignore
Message | When it appears | Why it is safe |
|---|---|---|
cannot evict pod as it would violate the pod's disruption budget | During node drains (Step 21) | StatefulSets such as PostgreSQL have a PDB configured by default. The installer retries until eviction succeeds. |
Unable to fix broken packages. Manual intervention is required. | During OS package installation (Step 22) | An OS-level package message that does not affect the Kubernetes upgrade. |
Ephemeral Disk Usage /var/lib/kubelet warning | Installer preflight (Step 19) and Admin Console preflight (Step 2.2) | Advisory only. Ignore if your backup size is under 600 GB. |
configmaps "kurl-config" is forbidden | During node upgrades | Transient RBAC message while the control plane restarts. |
Failed to get unit file state for firewalld.service | Installer startup (Step 17) | Simply means firewalld is not installed on the host. |
Appendix C — Troubleshooting
The upgrade appears frozen on a single component for a long time. A pod is failing to restart. SSH to the node, identify the pod, and force-delete it:
kubectl get pods -n kurl
kubectl delete pod ekc-XXX --force -n kurl
The upgrade terminated unexpectedly while I was copying a script. You most likely pressed Enter or Ctrl + C on node-1 while it was waiting. Contact Swimlane Technical Support before re-running the installer.
Packages fail to download behind a proxy or firewall. Confirm no_proxy is exported (Step 7) and that your installer override YAML is appended to every installer command, including the node-2 and node-3 scripts.
The installer halts immediately after startup. Verify that all pods in the kurl namespace are running (Step 17 requirement), then re-run.
Preflight fails on the Kubernetes version check in the Admin Console. Phase 2 has not completed successfully. Confirm all three nodes report v1.34.4 with kubectl get nodes -owide before attempting the application upgrade.